For many of us, Jekyll and Bootstrap still work.
This article will walk you through my method for using Bootstrap 5 on a Jekyll website (Bootstrap 5.0.1 at the time of writing).
My method is simple:
- Works with a a clean Jekyll install
- No gems or plugins required
- Less than 15 lines of code
Jekyll & Bootstrap
I still use them on projects. But growth and adoption has slowed over the years. And for many they aren’t a first choice anymore.
However, Jekyll and Bootstrap aren’t exactly unpopular.
Just look at Jekyll, hanging in there at #4 among the top 9 static site generators (by Github stars).
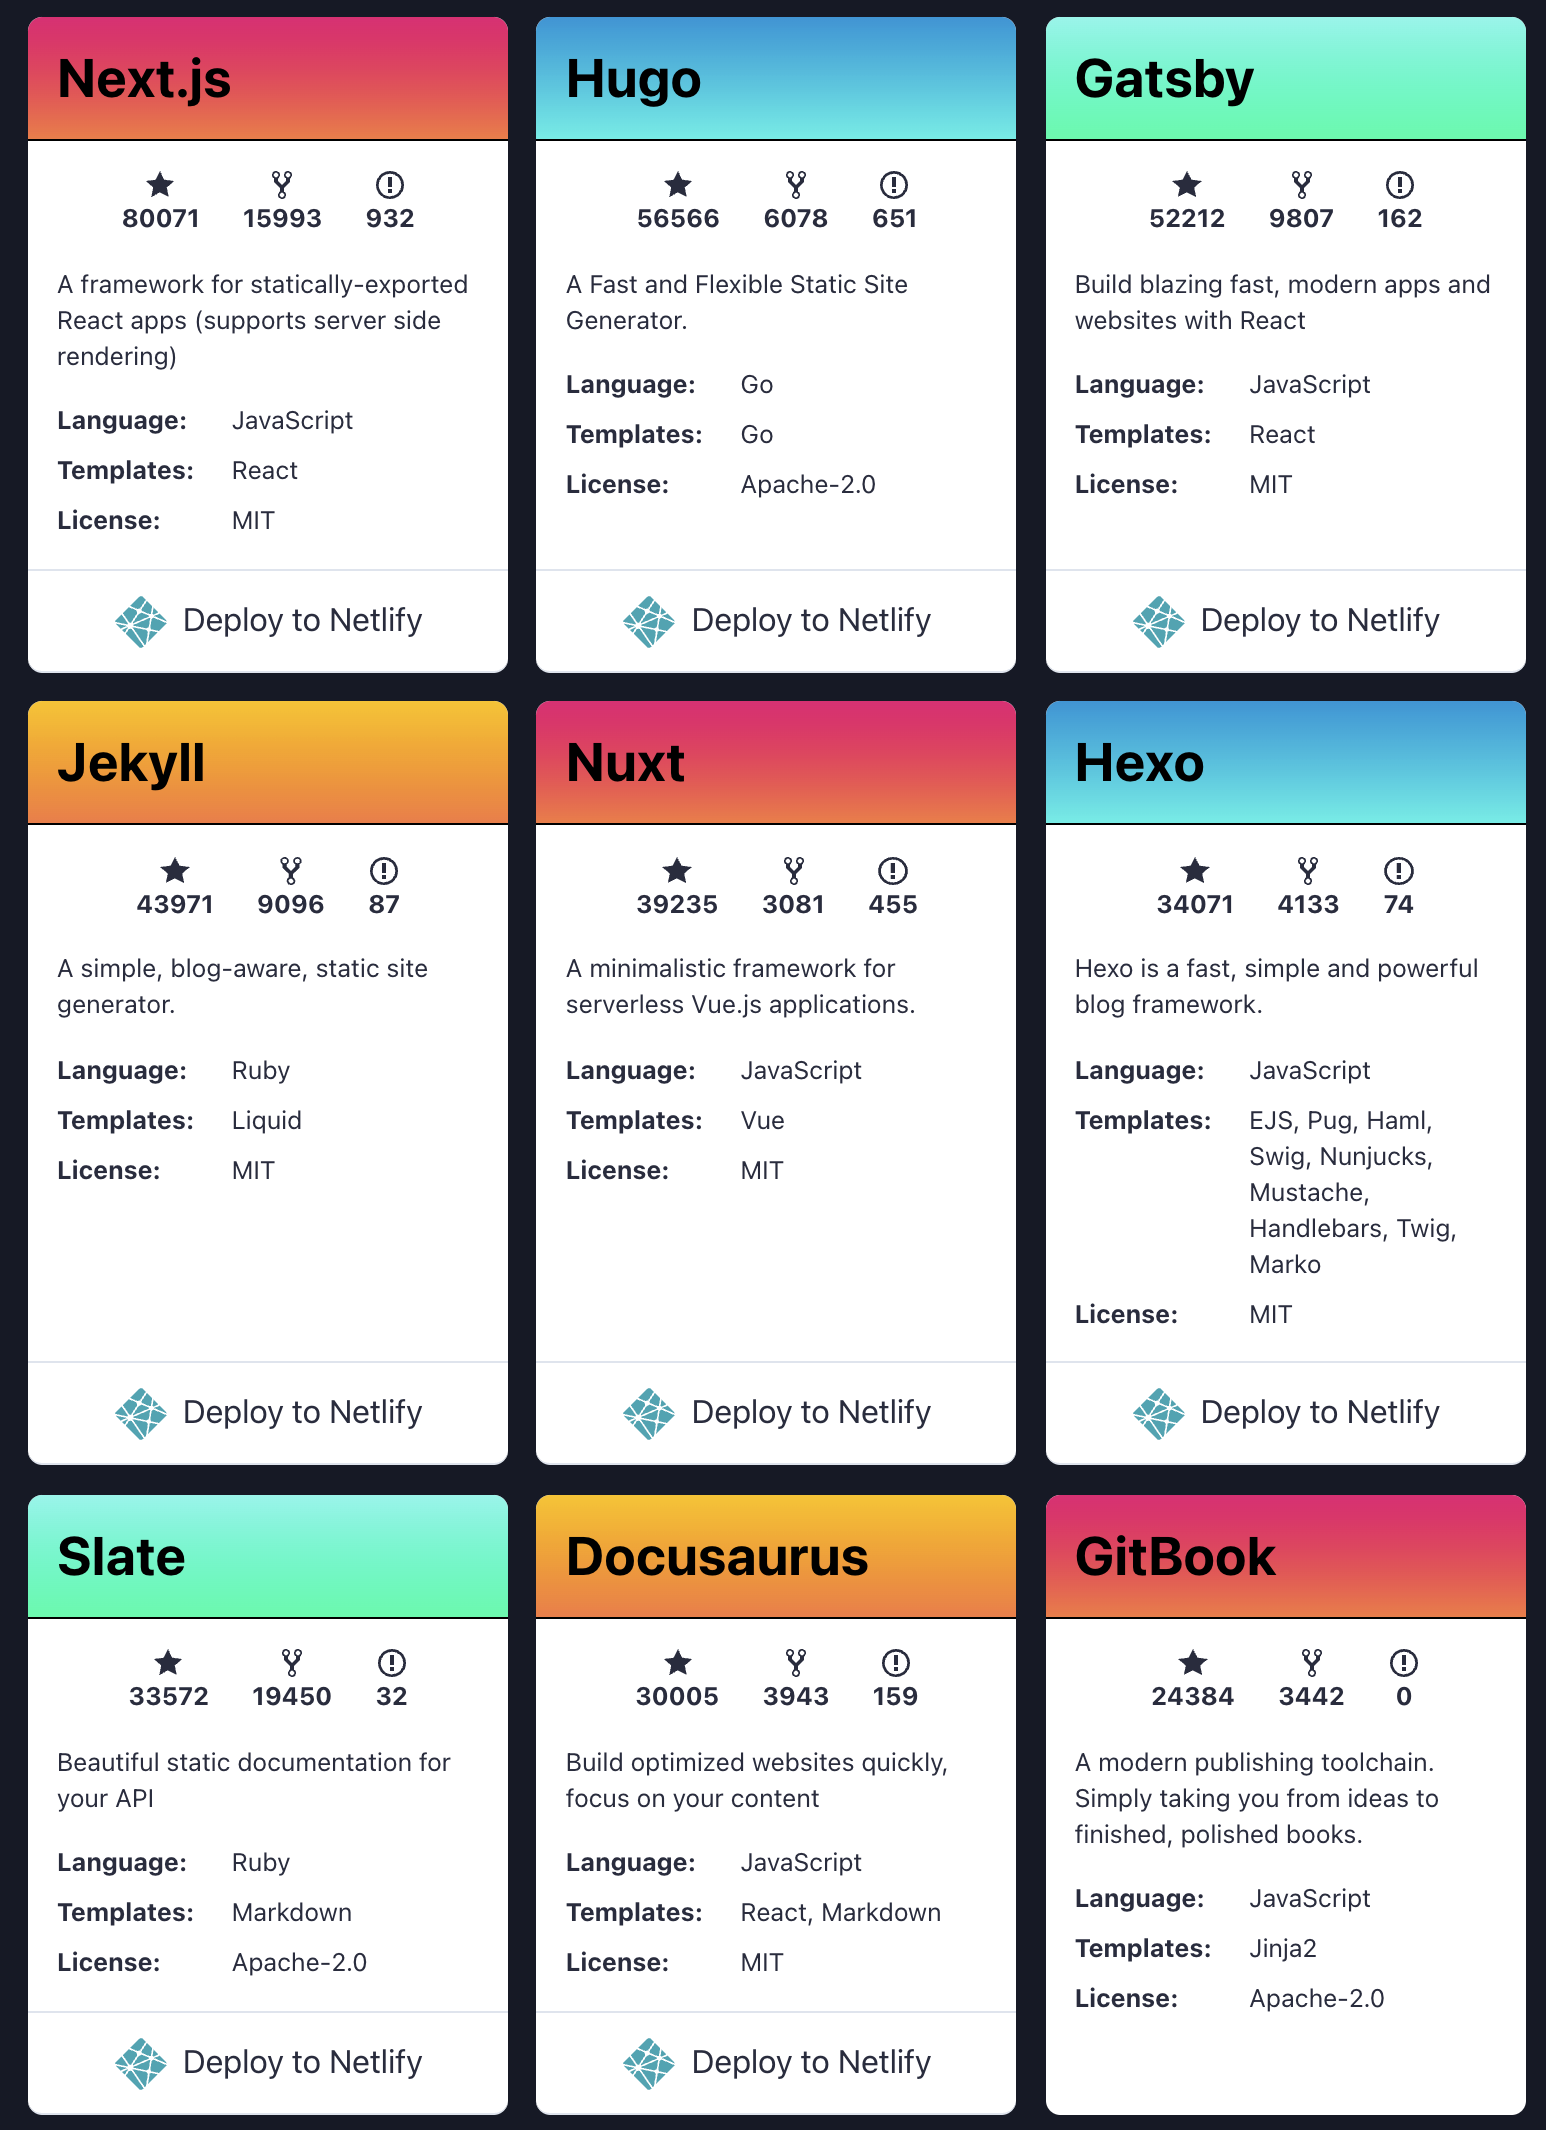 Top 9 Static Site Generators - https://jamstack.org/generators/
And Bootstrap is still the most popular frontend framework - impressive considering it launched in 2011.
 Bootstrap vs. Tailwind - Google Trends
Start with a blank Jekyll Project
Since Jekyll is starting to show it’s age, it’s common to find old repositories on Github that are hard to make work on your local system. For that reason, I like to begin with a clean slate. A blank Jekyll project.
If you’re new to Jekyll, I would encourage you to check out the docs -> https://jekyllrb.com/docs/
To set up a blank Jekyll project you can use the command below:
$ jekyll new jekyll_bootstrap_project --blank
This will create a new blank Jekyll site scaffold at specified path. Blank in this context means that we’re creating a Jekyll website without a theme.
Once you have a blank project set up, we can start configuring the new site to use Bootstrap.
Configure Jekyll Sass
The easiest way to add Bootstrap to our project will be to leverage Jekyll’s out of the box support for Sass, or Syntactically Awesome Style Sheets.
First we’ll need to tell Jekyll where to look for our Sass files.
We can do this by adding the following code to our config.yml file:
sass:
    sass_dir: _sass
Another (better) way to do this is:
sass:
    load_paths:
        - _sass
This will allow us to use other folders in the future if they would be needed in the project. I’ve found this method to be more useful than sass_dir.
Add Bootstrap to the Project
Next, we’ll need to download the Bootstrap code from https://getbootstrap.com/.
When you’ve downloaded the package, extract it and move it under the _sass directory in our Jekyll project. You could move only the scss files, but adding the whole folder works as well.
📦 jekyll_bootstrap_project
 ┣ 📂 _data
 ┣ 📂 _includes
 ┣ 📂 _layouts
 ┣ 📂 _posts
 ┣ 📂 _sass
 ┃ ┗ 📂 bootstrap-5.0.1
 ┣ 📂 _site
 ┣ 📂 assets
 ┃ ┗ 📂 css
 ┃   ┗ 📜 styles.scss
 ┣ 📜 _config.yml
 ┣ 📜 .gitignore
 ┗ 📜 index.html
Now you’ve included Bootstrap in the project - almost there!
Configure Bootstrap with Sass
Now, we’ll need to make sure we include the Bootstrap Sass in the main scss for our project. This is pretty simple.
Our styles.scss file - located in assets/css looks like this:
---
---

@import "main";
What does this do? I’ll let the Jekyll docs explain.
The empty front matter at the top tells Jekyll it needs to process the file. The @import “main” tells Sass to look for a file called main.scss in the sass directory (_sass/) by default which you already created directly under the root folder of your website). At this stage you’ll just have a main css file. For larger projects, this is a great way to keep your CSS organized.
That file will generate CSS for use on our website. So now, all that’s left to do is set up where we’ll be adding custom styles on top of the Bootstrap Sass we’ve already added to our project.
We’ll need to create two files in our _sass directory:
main.scssvars.scss
The first file, main.scss, is the main file for our project. We’ll write all of our custom styles there.
You’ll need to add the following code to main.scss:
@import "vars";
@import "bootstrap-5.0.1/scss/bootstrap.scss";

/* Custom Styles */
This code is importing both our Bootstrap SCSS code, and our other file, vars.scss into main.scss for us to use.
The other file, vars.scss, will be specifically used to override any Bootstrap defaults we want to change.
It should look like this:
/* Custom Variables */

$primary: red; /* change Bootstrap 5 primary color to red */
When you’ve done that, the project should look something like this:
📦 jekyll_bootstrap_project
 ┣ 📂 _data
 ┣ 📂 _includes
 ┣ 📂 _layouts
 ┣ 📂 _posts
 ┣ 📂 _sass
 ┃ ┗ 📂 bootstrap-5.0.1
 ┃   ┗ 📜 main.scss
 ┃   ┗ 📜 vars.scss
 ┣ 📂 _site
 ┣ 📂 assets
 ┃ ┗ 📂 css
 ┃   ┗ 📜 styles.scss
 ┣ 📜 _config.yml
 ┣ 📜 .gitignore
 ┗ 📜 index.html
The final step is to include the generated stylesheet in your markup. In our case we’ll want to add styles.scss to our index.html file.
And that’s it!

Now, simply run the following command to bring up your site:
$ jekyll serve
And your project is up and running with Boostrap 5!
You’ll need to add styles in order to see Bootstrap elements. I find it valuable to create a components.html file that I keep at the root of projects.
That way I can see what overriding defaults looks like.
Why do I use this method?
I found this method works best for me when working on simple projects. It’s very fast - and it doesn’t make assumptions about the structure of your project either.
This method also doesn’t take a lot of code (less than 15 lines total). And It’s easy to remember, so I can do this from a new machine without having to Google everything.
Last, but certainly not least: I don’t have to worry about dependencies, or other projects changing. The only setback is that you need a local copy of Jekyll and Bootstrap.
Notes for perfectionists
This method probably doesn’t follow ‘best practices’.
Using plugins and gems might save time and effort, make things more reproducible, and make upgrades easier. But I found them to be tough to install. And they made my projects hard to understand. I like to make changes to Bootstrap defaults, and doing that with plugins and gems was never easy for me.
But this is really easy for me. And hopefully someone else will find it useful.
There is a place and time for solutions that just work.